A well balanced soil grows happy Lithops!
There is always a lot of talk when it comes to "soil for succulents", just as with growing cacti & other succulents, and Lithops are no exception. Everyone has their own preferred mix.
When we reach back for habitat conditions it becomes quite clear that it is impossible to mimic all those specific geographical, geological differences in a collection.
The hint we are given by Dr Geyer in the Steve Hammer book is hard to implement because the climate parameter is missing to make it work.
Dr Geyer writes: "Most species are found in heavy soil, which retains the little available moisture ...... They are mostly found on bare spots where nothing else grows, except for some other small succulents and, after good rains, some sparse annual grasses ..."
Starting from there, the only soil that can be rather well controlled on moisture content in a collection and that is generally applicable, seems to be a
- highly draining fraction, entirely composed of mineral material (aka "stones"), rather coarse in structure
- almost inert, ie stable in a chemical and mechanical way
- with a low amount of "nutrient" binding and biologically active material. (aka anything "compost" like)
This leads to the advised very general 90:10 or 80:20 ratios of mineral to organic soils, or even anything in between.
Is it not possible to grow Lithops in other types of soils? Of course it is possible BUT ... the forgiving margin for (over)watering becomes extremely small with mixes that cannot be controlled on moisture content over longer periods of time, especially in the deeper layers where the roots are. Growing in such substrates can only be done with very very cautious watering making sure that there is never an excess of water in the soil. The main pitfall is that substrates, high in organics, may trick you in believing they are quickly drying up because the surface dries up, but in the deeper layers, the organic fraction stays almost soaking wet. Then people complain by saying " Look the soil is dry but my plants die".. then use a bamboo skewer to assess the moisture deep down, if one wants to go posh, buy a simple, dip in, moisture meter (no fancy stuff like incorporated pH meters and light meters, these only give fake measurements anyway) to give you a feeling how "wet" it is deep down in the pot. For sure, it is all tricky business!
So why the 80-90% mineral and 20-10% organic margin? The whole art is to compose a substrate that is as ideal as possible to accommodate Lithops BUT buffers your local climate and your unstoppable urge to water, as well! It is for you to find out if you are better served with maybe 80:20, 90:10 or even 95:5 if you are in a very wet climate.
An advantage of using a large mineral fraction is that one can play on the ratio of capillary/non_capillary "stones" used in the mix and which provides another valuable tool to control the moisture content of the soil mix over a longer period of time making the soil retain a slowly decaying amount of moisture and not becoming entirely dry in a tick.
The "capillary" concept must be understood as "stones that can absorb some water" and "stones that don't do this". Pumice stone for example, and other "foamy" structured stones, natural or synthetic, have small microscopical ducts and tiny amounts of water can penetrate inside and can be held there for some time. Hard rock like granite does not have such a characteristic and as such does not provide in a tiny water "reservoir".
Compounds that can be used, and I probably am forgetting some !
| - Pumice | - Lapilli | - Argex |
| - Granite | - Scoria | - Turface |
| - Aquarium quartz | - Tezontle | - Akadama |
| - Vermiculite(*) | - Pouzzolane | - Bonsai rock chips |
| - Zeolite | - Tuff | - broken bricks (terracotta) |
| - Lava | - Diatomite | - Molar clay (cat litter) |
(*) Vermiculite can be used with caution because it is capable of storing lots of water and it is mechanically quit eunstable (collapses) in "heavy" soils, but in a very dry climate it may be a help to store more water in the soil.
Many times people complain they cannot find these materials but one has to think lateral. Suppliers of accessories for swimming pools, aquariums, ponds, oil spills cleaning (Dry stall), cat litter (UK, Sanicat Pink) and even IKEA (Växer: pumice) carry interesting soil additives!
A quick note on "cat litter":
This material can be controversial as many "cat litters" are synthetic composites that clump together when moist but fall apart when wet. What I'm aiming at are those that are built from so called "molar clay" a special type of clay that is fired and the resulting "beads" are very popular both as cat litter and as a soil amendment. Search google for "molar clay" you will find an endless row of articles dealing with the situation both for cats and for plants. (and some buying advice as well) (Use the "water test" to check: put a handful of material in a cup of water, stir occasionally, let stand for 24 hrs, if it does not fall apart to mud but still show beads, then it may be used.)
On the enigma of using Perlite. A special case!
Often it is advised to use Perlite as a draining material in the mix of succulent plants. The argument is that Perlite is a "draining" material but unfortunately it is not. Perlite is capable of storing an awful lot of water, certainly in function of its grain size where the smaller sizes can store as much as more of its own volume! Besides this, it is extremely light and starts to float on top of the soil when watering and then the wind may blow it all over the place; plus breathing in the Perlite dust is not very good for your health.
See link here: The characteristics of Perlite
That is due to the fact that Perlite is a synthetic material "pop-corned" from Perlite ore. Where the ore goes at 1100kg/m3 the final puffed up material goes down to something like 30 to max 150 kg per cubic meter. (For reference: pumice is rated between 250 to 641 kg/m3)
Reference link: Density of pumice
Some amateur microscopical observations have revealed that Perlite causes the hair roots of the plants seem to penetrate into the material where they seem to die and become black (root meristem necrosis, Thanks Richard Ludlow). It is food for thought.
Should Perlite be banned as a soil additive? probably not, but it may not be a material of choice to advise for newbies who may use lot of it and just "drown" their plants. Once again, all depends on circumstances, and wisely used it maybe an asset in some cases (very dry climate?) but nevertheless one should never forget about its ability to store lots of water! Maybe use with caution if your cultivation experience allows for it!
Further "misery":
People do not seem to have clear ideas about what is Pumice, Perlite or Vermiculite.
While pumice is a naturally occurring mineral (solidified volcanic "foam"), Perlite and Vermiculite are not. They are "prepared" from mineral "ore" but kind of puffed up (like pop corn) at high temperature, mostly in the presence of steam/water.
Perlite and Vermiculite are able to store as much as 300% of their own weight in water. Not exactly a material of choice to grow water-"repellent" succulents.
Not all chicken grit is created equal!
An excellent soil additive to improve the free draining capacity of the substrate is "chicken grit" but only if two conditions are met:-a) it needs to be a an acceptable grain size, somewhere 3 to 6 mm across, preferably with a range of these sizes
-b) it needs to be "granite" or some other non alkaline hard stone. Broken bricks is also acceptable.
Much chicken grit is sold with "sanitizing" additions, like oister shells and/or probiotics.
For the "probiotics" it goes without saying, your plants don't need it.
But sea shells may be a real problem as the are pure calcium carbonate, and that is something one does not want in the soil. That may ruin the acidity of the soil in the (not so?) long run.
Root trimming:
There are a lot of discussion about "should I trim the roots before planting". There is no rule and it certainly is not compulsory, but many times plants may benefit from root trimming especially if purchases have been grown in heavy peat soils where "half" the root ball is suffocating the roots. It may be easier to just cut off all the side roots and just keep the central tap root, which in turn may be shortened to about 1 inch. It goes without saying that utmost care must be taken to NOT break off that central root as there is the danger that the "meristem" aka the plant's growing point breaks off as well and that is lethal to the plant. It won't recover from that.
Planting:
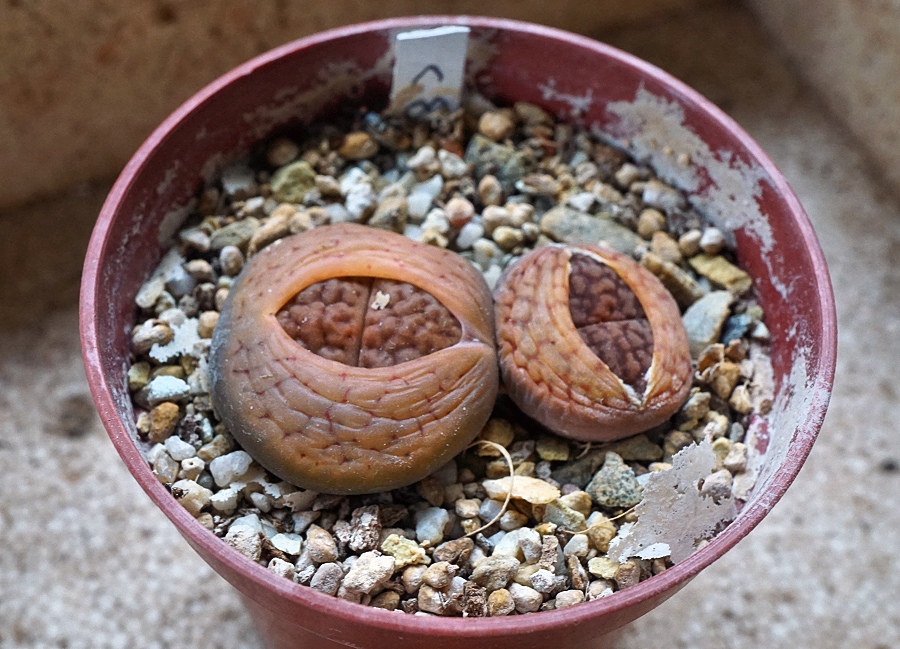
Actually there is nothing simpler than planting Lithops. Lithops plants need to be planted deep enough. That is, mostly, up to the discoloration mark on the side. There is an excellent reason to do so, namely the deep planting helps to cool down the plant in the summer, due to much larger contact surface plant/soil. and BTW, the "tap root" of Lithops is very prominently visible in the picture.

So, the easy part is to actually trim that central root back to about 1 inch or even a bit shorter (I use 2 cm "de visu").
I prepare my pots by putting a very thin layer of moist potting soil at the bottom of the pot and compressing it with a "trimmed" wooden stick to even the surface. They layer is not thicker than 0,5 cm (1/5"). It is there to prevent that the very granular soil "flows" away through the holes in the pot.
Then I fill the pot with the substrate. It can be very slightly moist or dry. I prefer it to be dry so it can be "tapped" down to the most dense layering. Then I moisten the surface with a some drops of water just to hold the rims of the holes I'm going to make in the surface.
Then I use a round, pointed skewer to poke a hole in the soil, gently rotate the top of the skewer while keeping the point fixed in the soil. the result is a nice conically shaped hole in the soil that is held open by the slightly moist soil. the hole can be made "to fit", that is, with some skill and a good eye the hole shape can be made to just accommodate the Lithops plant that it is made for.
The advantage of only moistening the top of the layer is that the rims of the hole do not collapse but the soil will be dry again within a few hours or even less!
If preparing the plants before the planting operation, ie trimming the roots and removing old soil, planting a dozen of Lithops plants is only a matter of a couple of minutes.
I do *not* water plants right after planting, my climate is not stable enough to take that risk. After a couple of days I start to mist and observe what the plants are doing then I may proceed accordingly. (see also below)
Important hint: When buying plants that have been grown in "potting soil" (almost all commercial bulk offers), make sure that you remove ALL that old organic soil from the roots. Wash the roots gently and if needed, several times, use a toothpick to gently remove soil parts from between the roots. Some root smay come off but that is not a problem. Let the plants dry sufficiently long in a well aerated, clear place but *not* in the sun. Then pot in an appropriate mix and proceed.
The often advised "method" (as one can see on youtube) where rubber bands are put around the container and the plants are stuck and held by the crossing rubber bands is not very good. The plants cannot be pushed in deep enough or one would have to fill the pot up to the very rim, leaving no rim space to retain the water + soil from floating over the rim when "drench" watering the plants near and in the growing/flowering season.
Can I split "twin" Lithops?
When Lithops produce "twin plants" after a change of leaves, then both heads grow on the same root. It is like several leaves growing on a tree branch.
Many times people ask if those Lithops can be split. The "short" answer is: yes, they can.
The long answer is: but you should not do this unless you have a stringent reason to do so.
The whole charm of cultivating Lithops over the years is to let them evolve into large clumps, that is large plants with several "heads" all growing from the same central root!
Splitting Lithops at an early age require a lot of surgery skills! Mostly it needs to be done by carving through the very hard and woody, central root and split that up so each plant gets a piece of it. Mostly this needs a lot of force and most of the time it happens that the central root breaks off, off one of the heads so one head gets all and the other gets none. A head with no root tissue is doomed.
A tip:
Plant your Lithops in a pot with sufficient enough soil!! I see a lot of plants that are like disappearing in the depth of the pot and the rim is a true shadow border. looks as if they were planted in the depths of a stove pipe! LOL!
You should plant your Lithops in such way that only about 0.5 cm aka 1/5 inch of the inner rim of the pot is visible above the soil level. That is just enough to prevent water from flowing over the rim! If it does, then your soil does not drain enough!
In concreto ... What I do:
- My substrate: ... The substrate needs to be dominantly mineral and well draining BUT it needs a portion of "finer" grained material to hold/trap some moisture AND to give the roots some material to have a grip on. This means that using "pea gravel" or "coarse pumice" in large sizes with 10% of potting soil may be too coarse, in general, or for your climate and too coarse for holding enough water in the short term. Ergo, your plants will see no reason to start putting out roots because your soil may just not trap moisture at all or not long enough to make them aware of moisture. That is why I sieve my mineral soil with a 0.3-1 mm mesh sieve which makes it contain a fraction of finer but still draining material. Secret of the cook: if the soil mix seems too coarse I may add 0.1 or 0.2% of coarse sharp sand but that is a dangerous information as most people may have no clue how much 0.1% may be in amount.

- Plant establishing: one cannot expect a freshly planted Lithops to be accommodated in the new substrate after a week. I needs more time AND SOME GOOD CARE! Just yanking it into some soil and forgetting about it just won't work. One needs to stimulate root growth by careful misting or minimal moisture given from below just to put some humidity into the lower few millimeters of the soil in the bottom. Don't trust it that your presumed "humid climate" will do the work for you, it won't. (IMHO, it doesn't for me anyway!)
(Note= I see that people have a tendency to interpret this type of "watering" in a very literal way, ie watering from below being "a must". My only aim here is to emphasize that the plants only need a very minimal amount of moisture, which can be easily dosed as "mist" and/or an equally low amount of moisture given from below. If you are in a very warm climate and you know that your substrate is very draining, then there is probably no reason why you would not be able to just "water" the plants, but don't tell people that I advised you to do so, aka don't try this at home if conditions are not met!)
On the matters of "Top Layers" or how not to use them!
Many people desperately want to grow Lithops while they bury their soil under a (big?) top layer of all sorts of fancy stones, glass beads, marbles, crystals and whatnot to hide the soil and emphasize the "aesthetics" of their planting.For me, that is a useless practice and it may probably harm your plants, especially if you are a newbie and searching for a method to avoid killing your plants.
Growing succulents, and especially ultra-succulent plants, involves a free water evaporation from the soil *and* a free soil/gas(air) exchange in order to provide for a healthy, breathing substrate.
So, if your major aim is to grow "some curious plants" in a posh pot and with an attractive suface layer, then stay away from Lithops. There is a very big chance that you will not be able to really work it out.
That needs work and a plan! ... using coarse soils with almost no capillary action is maybe fine in terms of draining capacity but it will block any sort of possibilities for gentle watering "from below" as water will not be "sucked/wicked up" by capillarity action and YES, I do not talk about plopping a pot with Lithops into a bucket of water to teach it how to swim ! It needs more subtlety than that!

- I see lots of wrinkled plants in discussion groups and for which I think that they have not seen any drop of water in months, people insist that they watered them (or not!), yet I see no trace of that ... then I wonder ... Is all the above at stake ? Then the owners ask "should I water my plants?". In most of those cases I am inclined to answer: "NO, your plants probably have no roots, you may just kill them by just drowning them, make them grow roots first", proof of the pudding: the many pictures of dug up plants after x-weeks, y-months that only show like "amputated stumps" of roots. It is just not normal.
People argue that they are in hot climates and that this represents a problem. Fair enough but Lithops in habitat get "cooked" as well yet they do not seem to wrinkle "ad infinitum" so where is the catch?
The problem is the nightly cooling or rather the lack of it. Lithops, like many other succulents, have a CAM metabolism (see Wiki). This means that products that are build up by photosynthesis during the day are not processed during the heat of the day because of the possible loss of water in the process. These compounds are stored in the plant as different intermediate molecules. When the cool night comes the these stored compounds are further processed to complete the whole process involving water and gas exchange. This involves the compulsory condition of lower night temperatures. Well under 20°C is suggested. If this cannot be met then the plants may be slowly poisoning themselves because the digestion cycle is never brought to an end.

I may want to draw the attention that, again, "a certain amount aka fraction" of the mix may need a finer grained structure, but people will need to find out how much is suited in their conditions, and the same concept as with watering, do NOT swing entirely towards the other extreme ie if a bit of water doesn't help then give it a drench ... same goes for the soil structure. .. and give the plant the time to "feel at home" ;-)
... and to avoid possible confusion: the soil is a MIX ie all components are mixed together to provide a substrate that is as homogeneous as possible. People can put a top layer but I keep on advising against doing so ;-) Due to the effects of watering the finer particles will be washed down anyway so a certain granulation is needed also for the finer fraction. You'll find out by trying it ...
 |  |
 |  |